The steps
Preparation:
- We need to setup our local ethernet interface to a static IP. Example: 192.168.1.10
- And we need to set the subnet mask to: 255.255.255.0
- And lastly setting the default gateway to: 192.168.1.1
Execution:
-
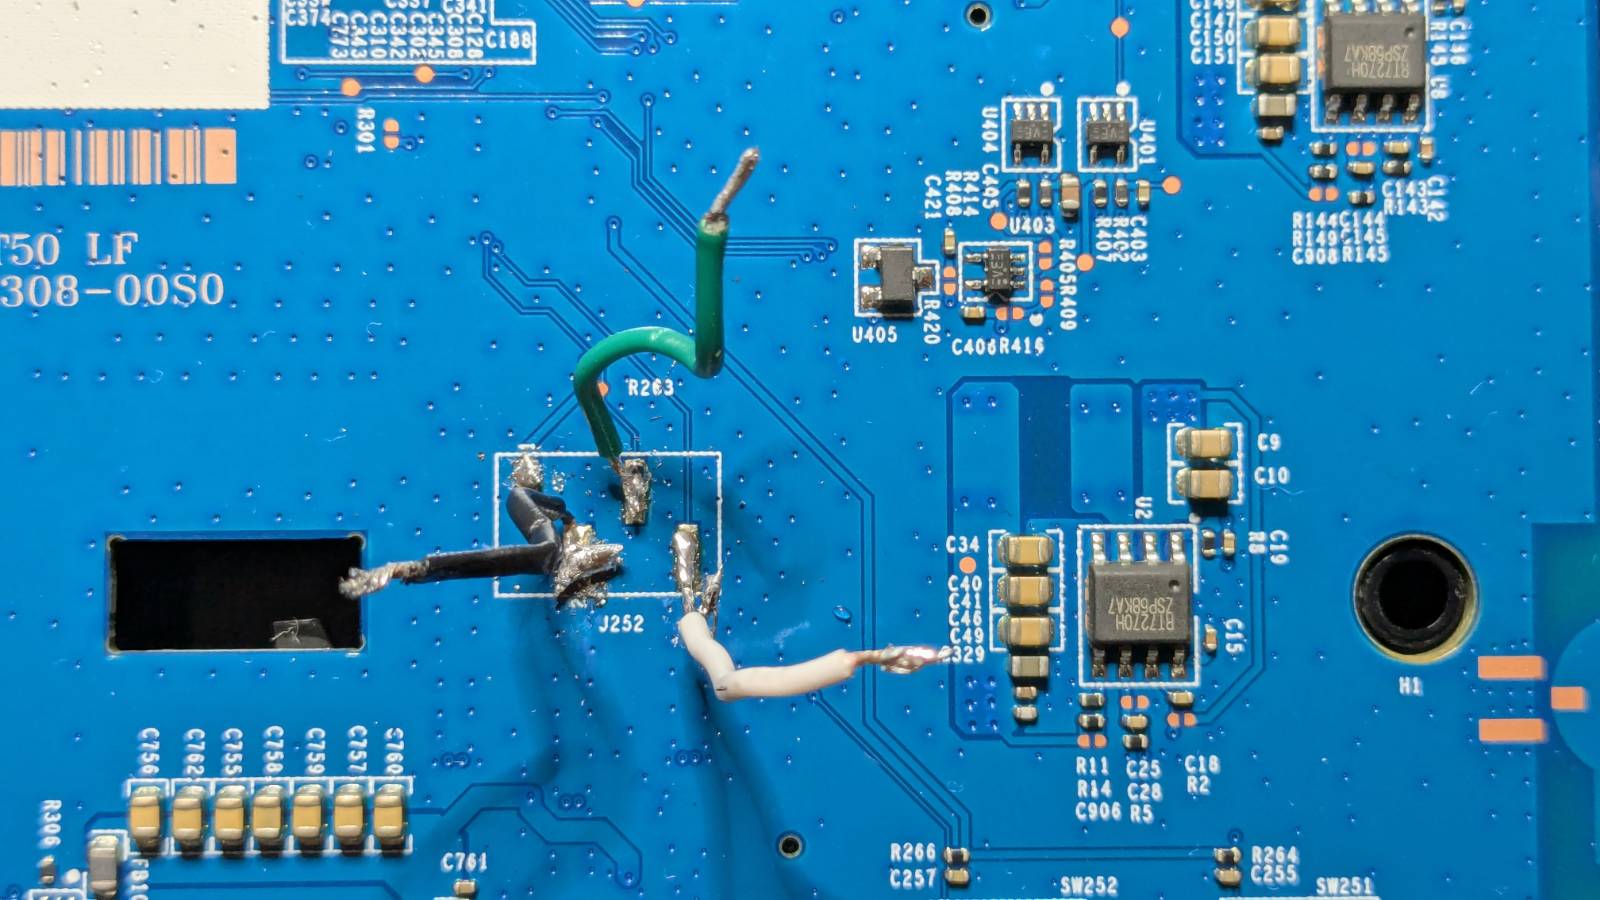
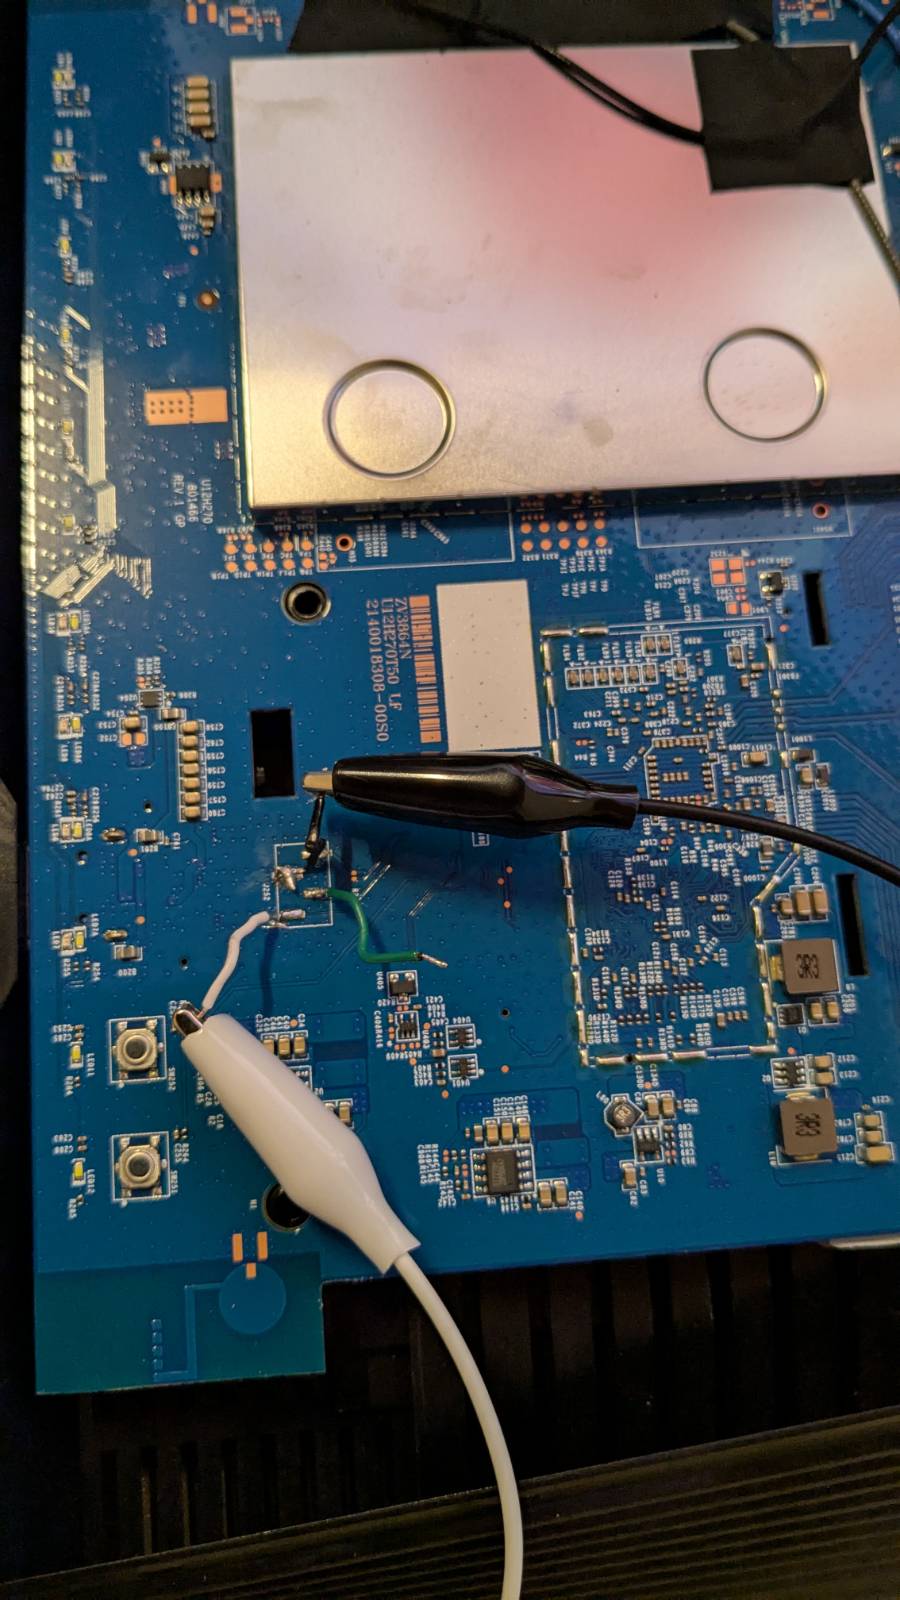
Plugin the USB interface converter and place the wires to match the ones in the picture.
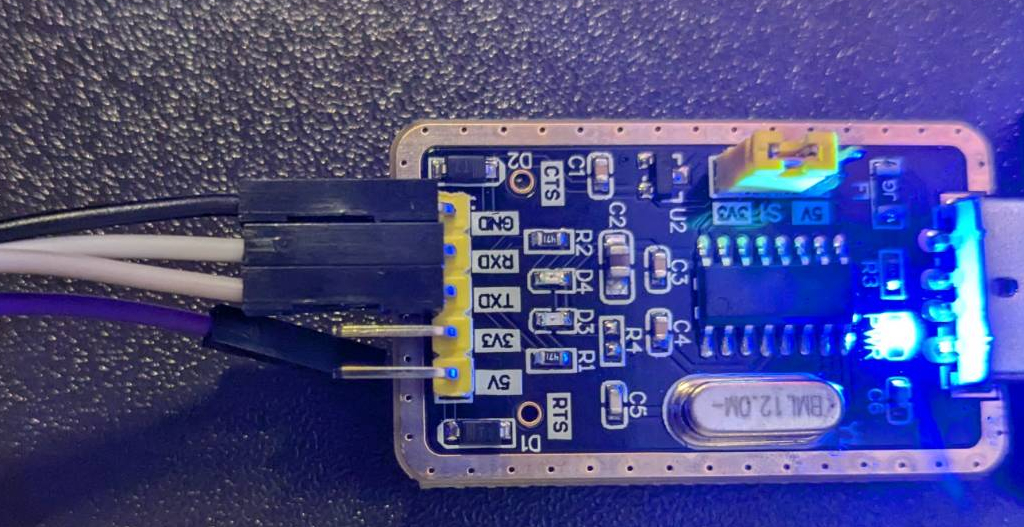
Now on the PCB connect the wires to the USB interface converter.
Black goes to black, white goes to white and then connect the last wires.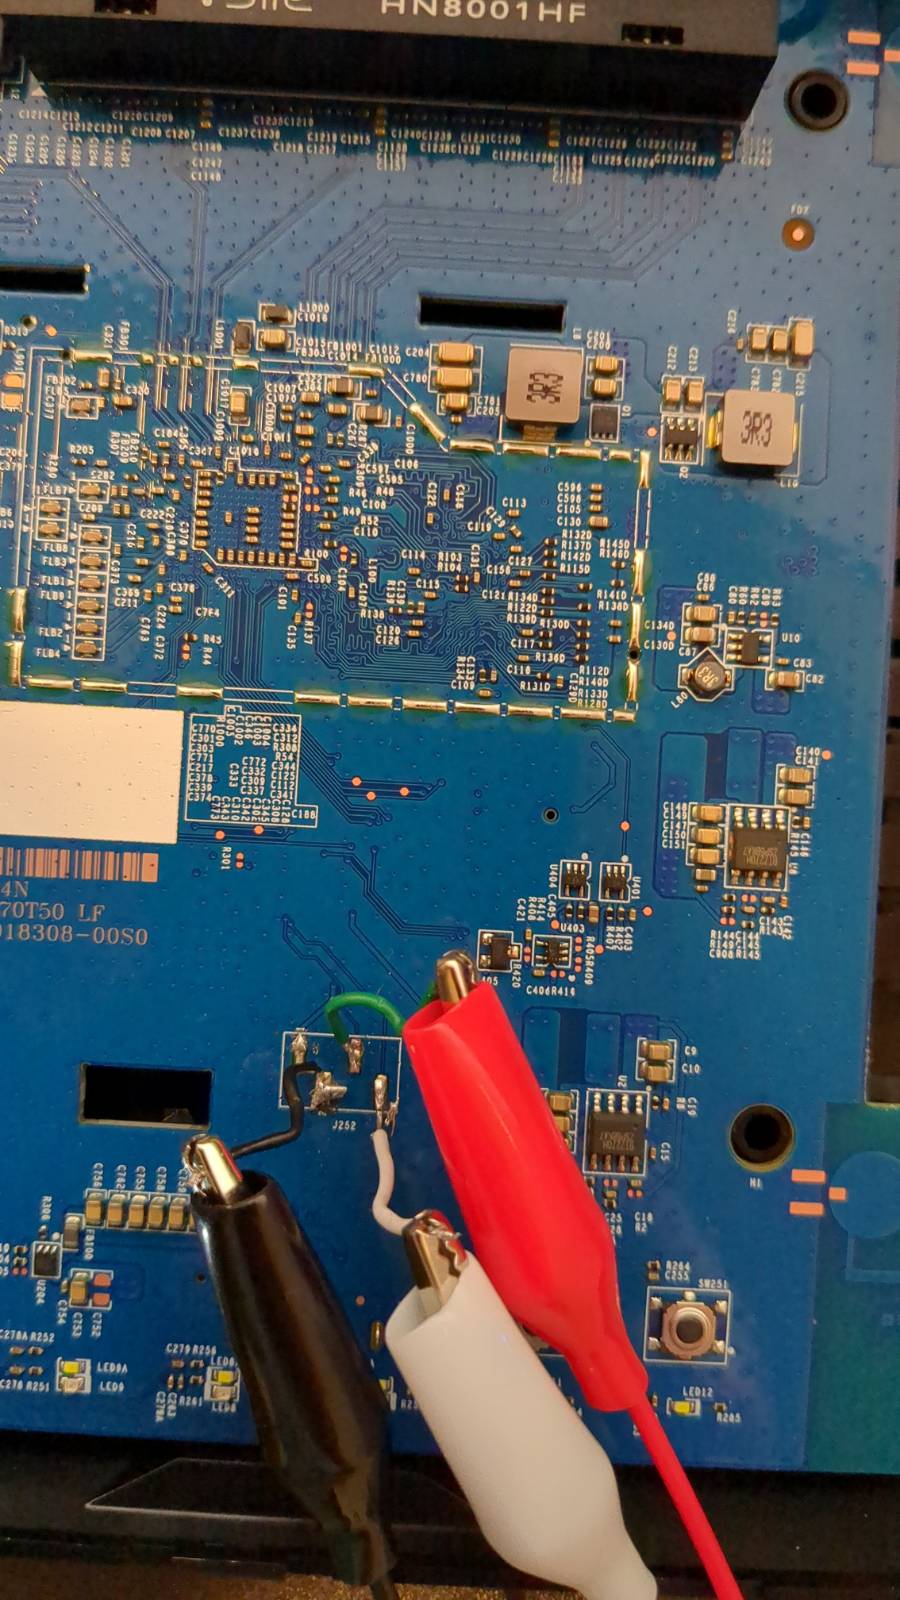
-
Open a serial console on you PC like puTTY and select the correct COM port
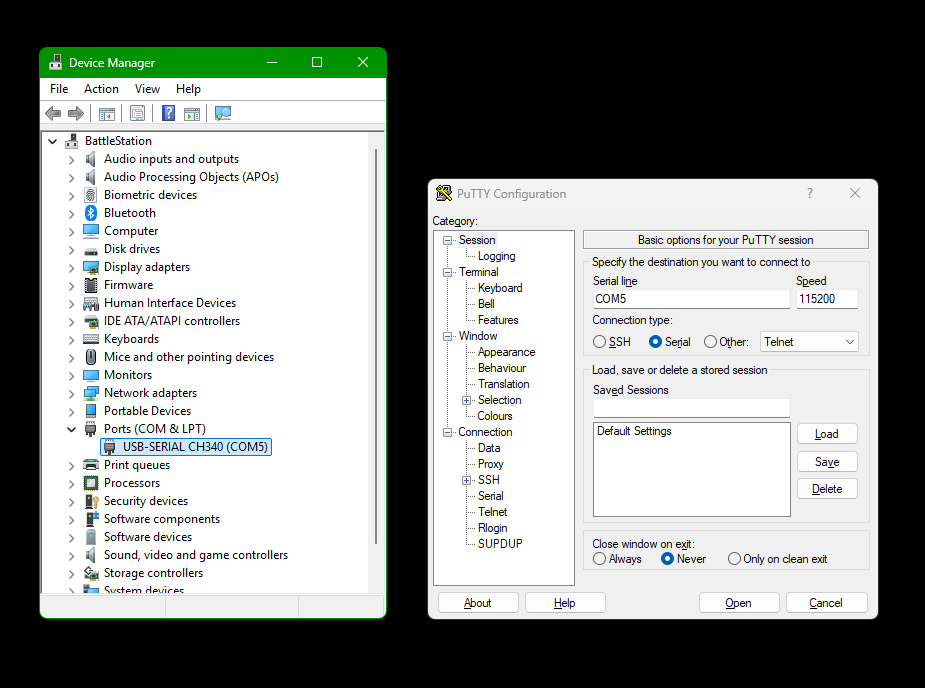
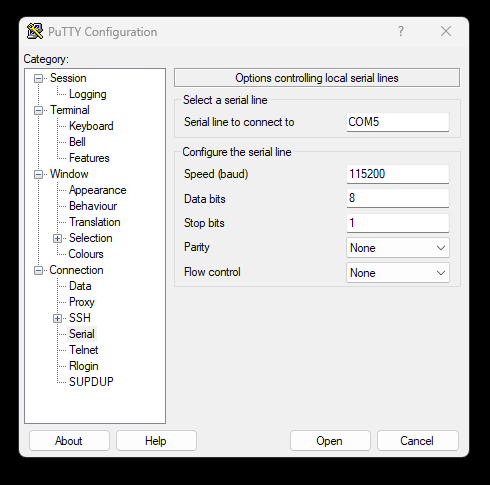
- Set baudrate to: 115200
- Set data to: 8
- Set stopbit to: 1
- Set Parity to: None
- Set Flow Control to: None
Now in PuTTY click "Open" and turn on the device.
Now you should see output from the UART connection.
Issues I ran into:
Most likely to my bad sodderings :)
Gibberish output:
I started out by soddering a 4-pin connector onto the PCB. But when I connected from puTTY I got a lot of gigibberish output.
So I decided to remove the 4-pin connector and sodder wires directly onto the PCB.
And this seemed to solve this issue.
No output:
If you do not get any output at all when you turn on the device and the led does not flash as they are supposed to.
Either try switching the 2 non-black wires or. Try to turn off the device and disconnect the (on my picture) red wire.
Then turn on the device and as soon at the power turns on connect the red wire again.
I do not know why this can happen but I experienced it and found this solution.
-
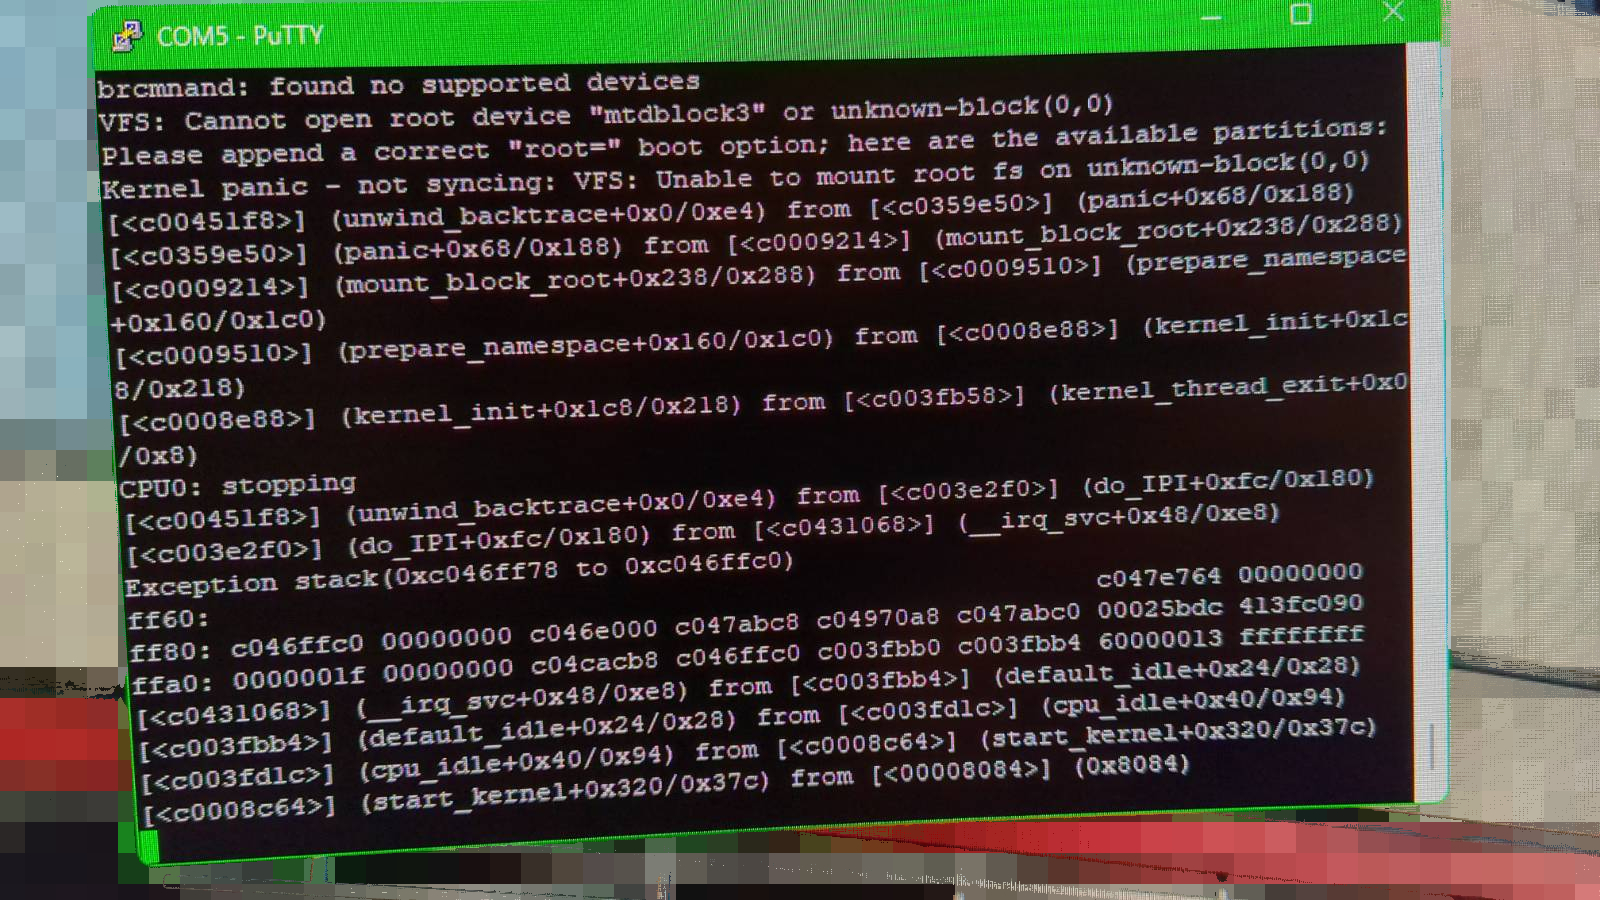
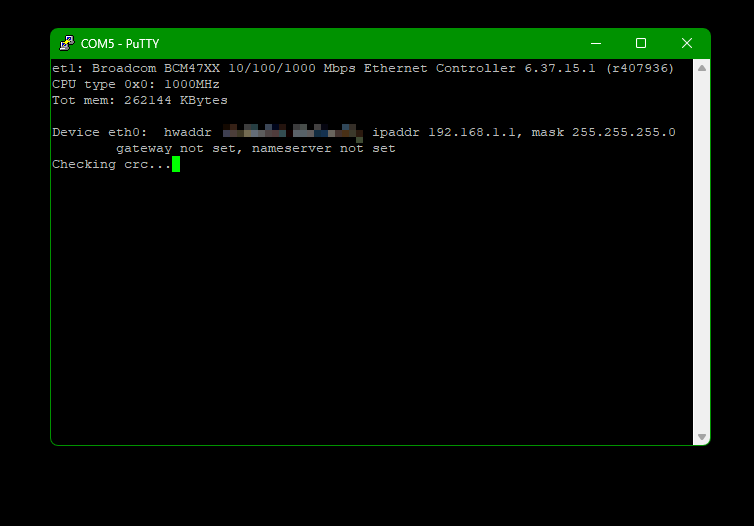
Here we can see that the root file system is not present which could indicate that the file system is
corrupt.
And this is what we expected so we do not worry. :)
-
We reboot the device and spam ctrl+c until we get the CFE.
Then we enable the tftp daemon.
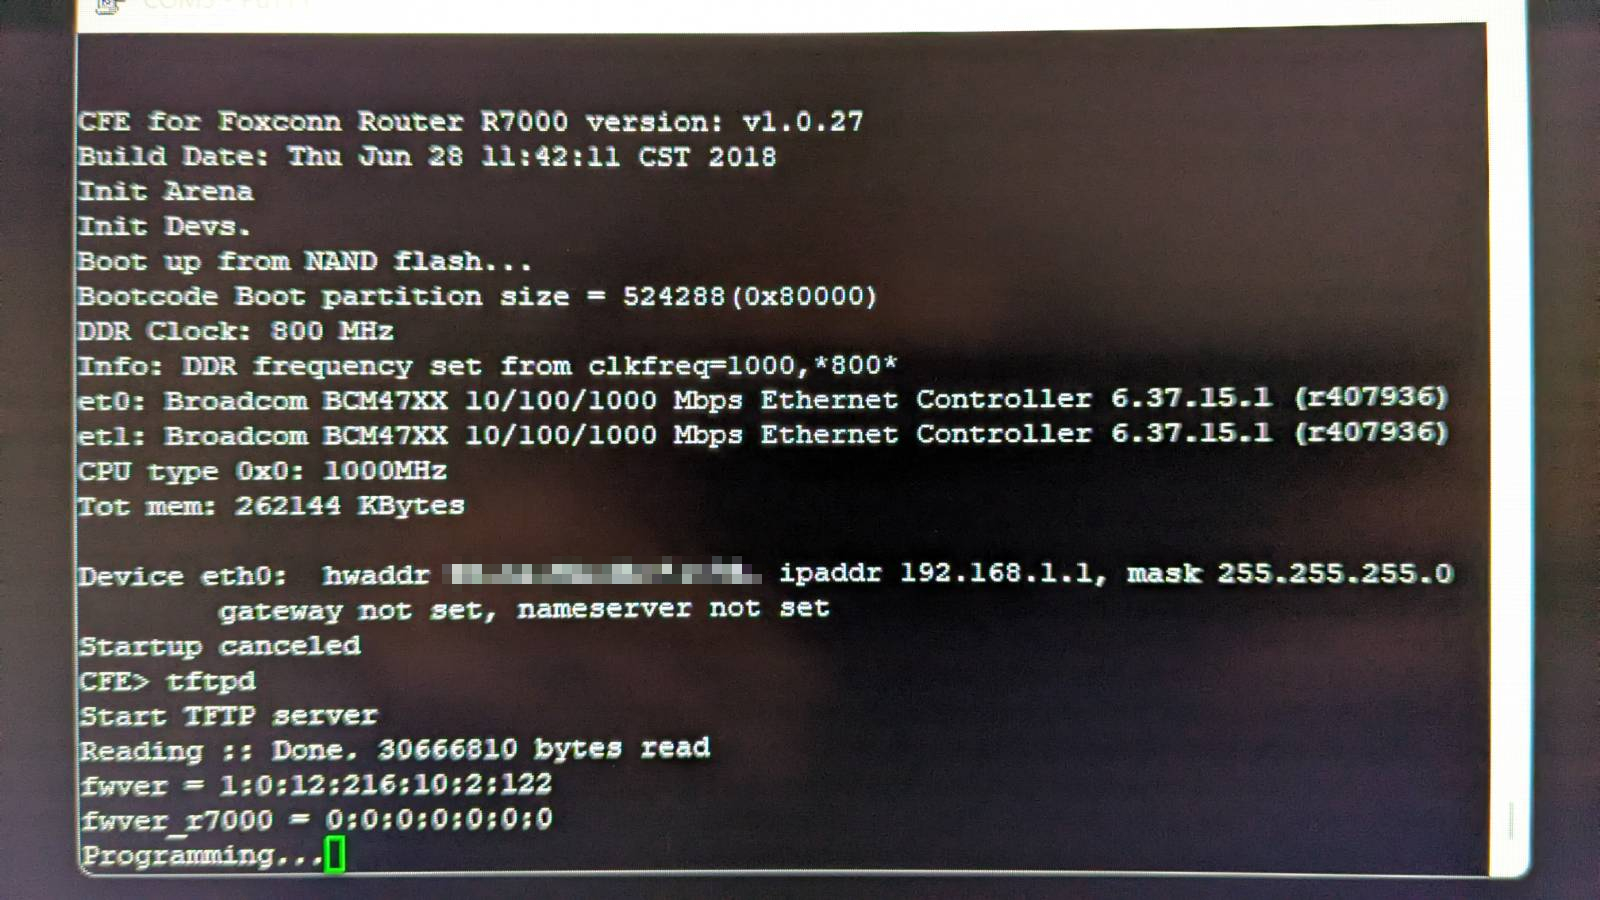
-
We can now from our PC upload the original firmware with a tftp client.
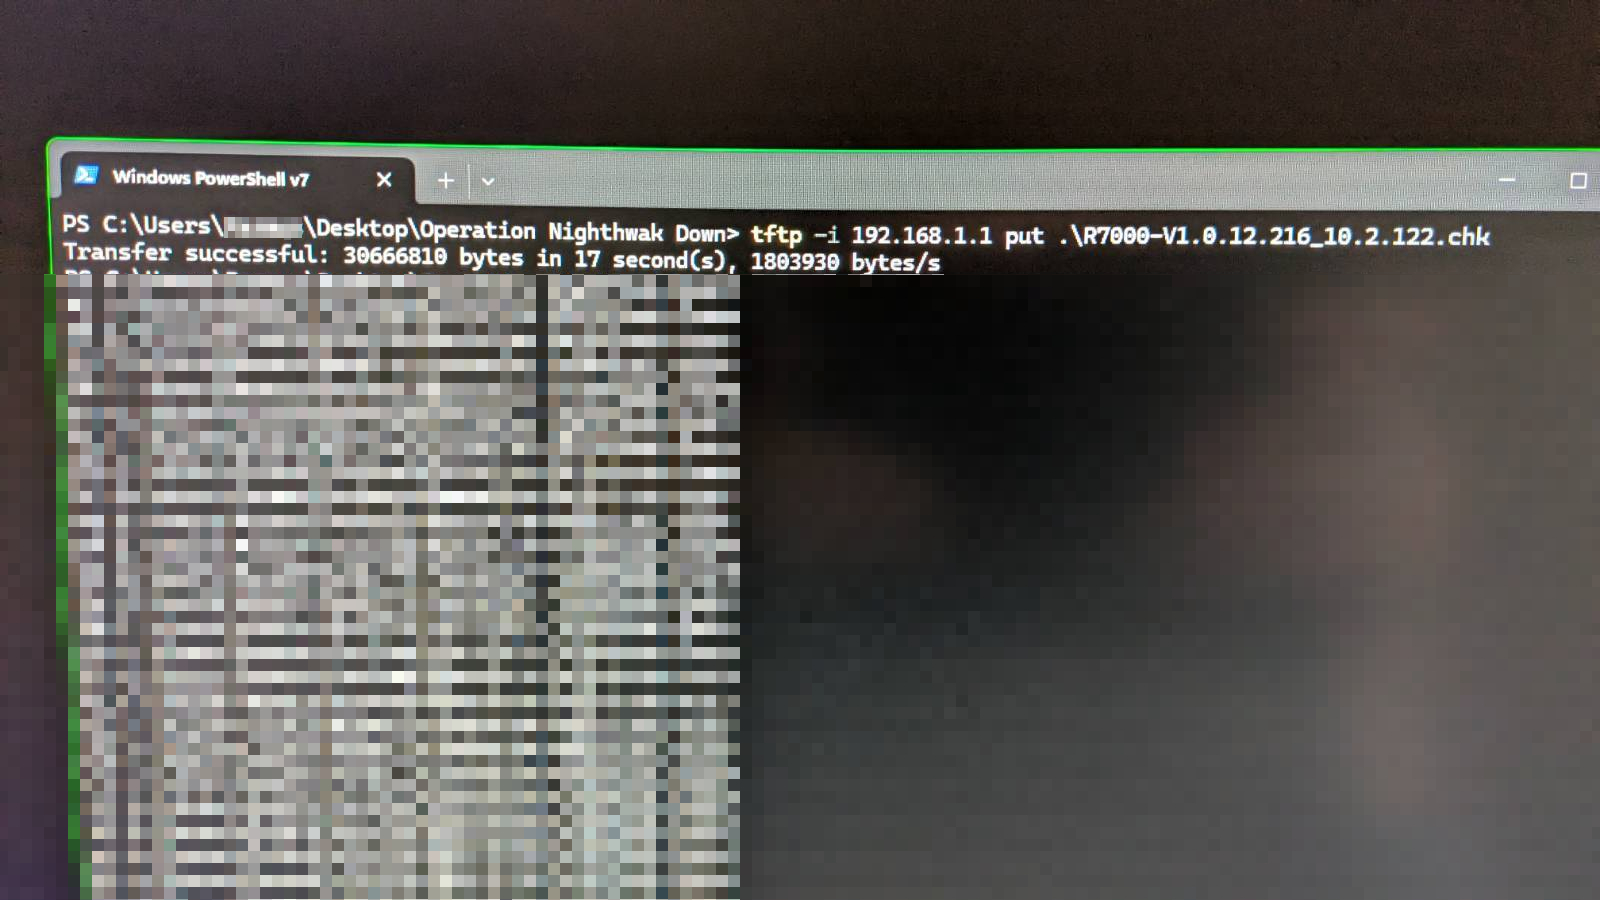
-
Now we can reboot the device and confirm that it boots normally.

-
And we can reach the default setup page by visiting https://192.168.1.1
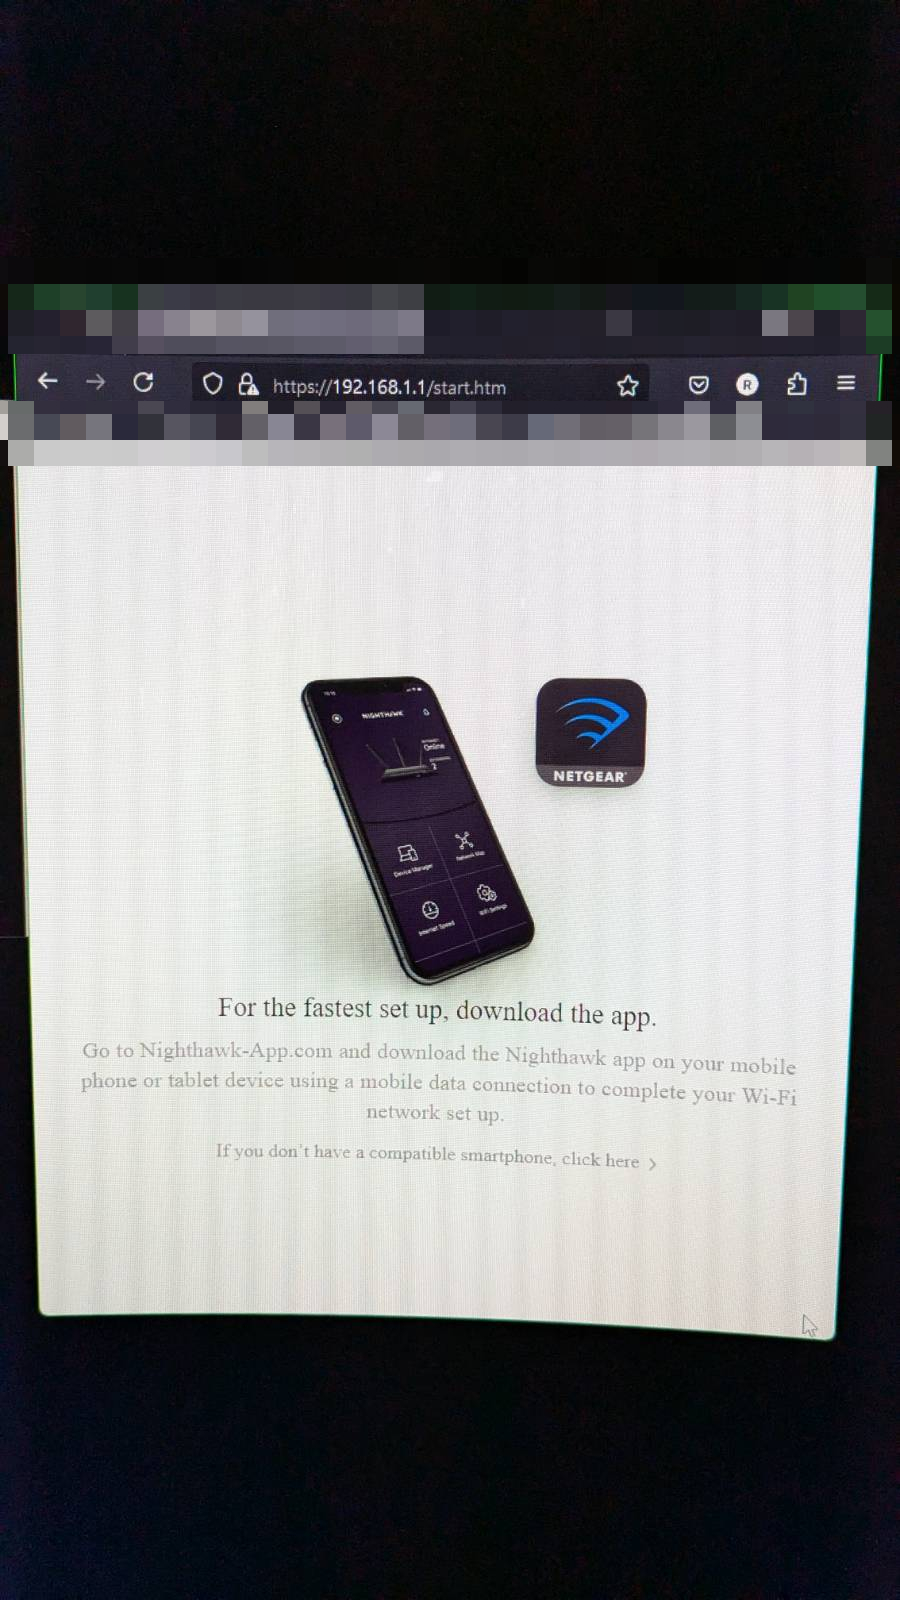